Bash Completions
You can enable completion commands by setting the EnableBashCompletion flag on
the App object to true. By default, this setting will allow auto-completion
for an app's subcommands, but you can write your own completion methods for the
App or its subcommands as well.
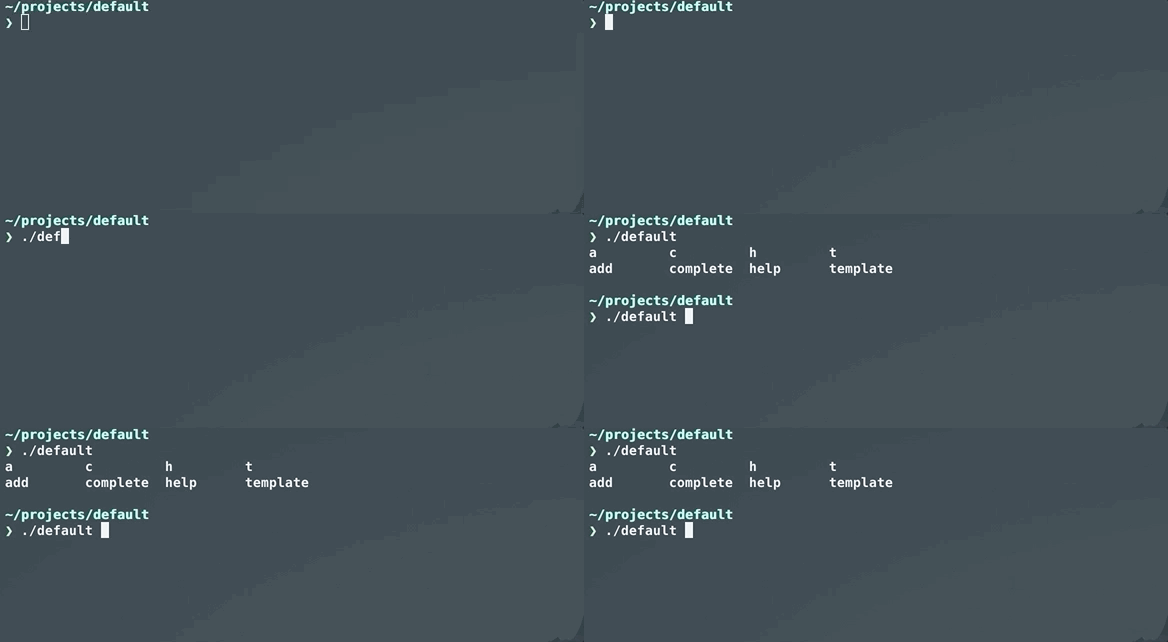
Default auto-completion
package main

import (
    "fmt"
    "log"
    "os"

    "github.com/urfave/cli/v2"
)

func main() {
    app := &cli.App{
        EnableBashCompletion: true,
        Commands: []*cli.Command{
            {
                Name:    "add",
                Aliases: []string{"a"},
                Usage:   "add a task to the list",
                Action: func(cCtx *cli.Context) error {
                    fmt.Println("added task: ", cCtx.Args().First())
                    return nil
                },
            },
            {
                Name:    "complete",
                Aliases: []string{"c"},
                Usage:   "complete a task on the list",
                Action: func(cCtx *cli.Context) error {
                    fmt.Println("completed task: ", cCtx.Args().First())
                    return nil
                },
            },
            {
                Name:    "template",
                Aliases: []string{"t"},
                Usage:   "options for task templates",
                Subcommands: []*cli.Command{
                    {
                        Name:  "add",
                        Usage: "add a new template",
                        Action: func(cCtx *cli.Context) error {
                            fmt.Println("new task template: ", cCtx.Args().First())
                            return nil
                        },
                    },
                    {
                        Name:  "remove",
                        Usage: "remove an existing template",
                        Action: func(cCtx *cli.Context) error {
                            fmt.Println("removed task template: ", cCtx.Args().First())
                            return nil
                        },
                    },
                },
            },
        },
    }

    if err := app.Run(os.Args); err != nil {
        log.Fatal(err)
    }
}

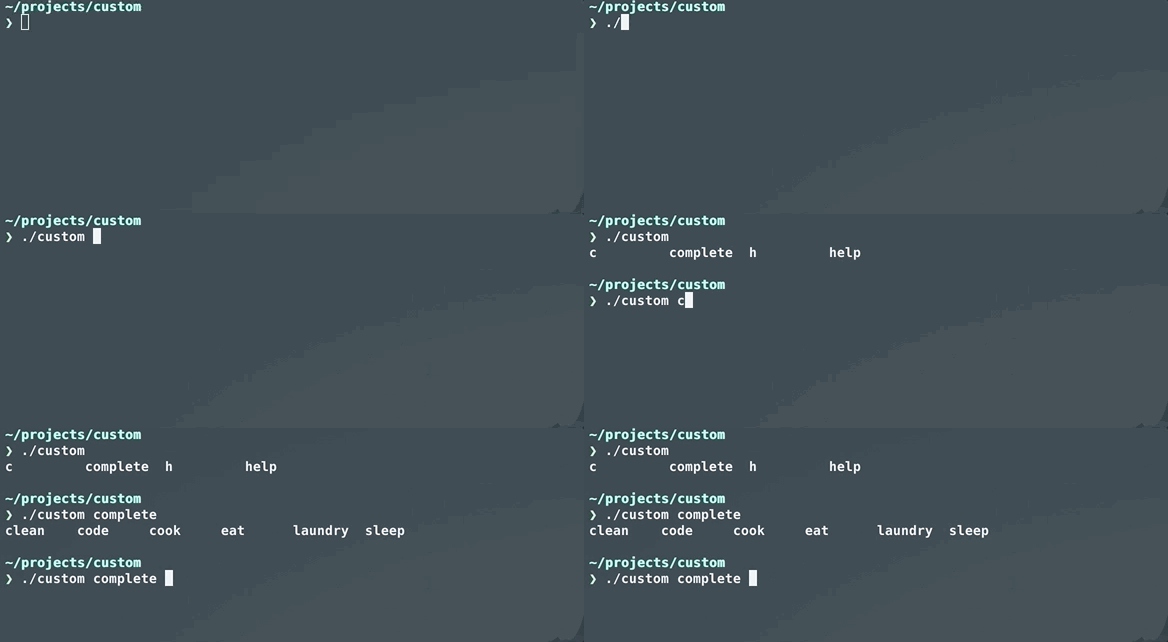
Custom auto-completion
package main

import (
    "fmt"
    "log"
    "os"

    "github.com/urfave/cli/v2"
)

func main() {
    tasks := []string{"cook", "clean", "laundry", "eat", "sleep", "code"}

    app := &cli.App{
        EnableBashCompletion: true,
        Commands: []*cli.Command{
            {
                Name:    "complete",
                Aliases: []string{"c"},
                Usage:   "complete a task on the list",
                Action: func(cCtx *cli.Context) error {
                    fmt.Println("completed task: ", cCtx.Args().First())
                    return nil
                },
                BashComplete: func(cCtx *cli.Context) {
                    // This will complete if no args are passed
                    if cCtx.NArg() > 0 {
                        return
                    }
                    for _, t := range tasks {
                        fmt.Println(t)
                    }
                },
            },
        },
    }

    if err := app.Run(os.Args); err != nil {
        log.Fatal(err)
    }
}

Enabling
To enable auto-completion for the current shell session, a bash script,
autocomplete/bash_autocomplete is included in this repo.
To use autocomplete/bash_autocomplete set an environment variable named PROG
to the name of your program and then source the
autocomplete/bash_autocomplete file.
For example, if your cli program is called myprogram:
$ PROG=myprogram source path/to/cli/autocomplete/bash_autocomplete
Auto-completion is now enabled for the current shell, but will not persist into a new shell.
Distribution and Persistent Autocompletion
Copy autocomplete/bash_autocomplete into /etc/bash_completion.d/ and rename
it to the name of the program you wish to add autocomplete support for (or
automatically install it there if you are distributing a package). Don't forget
to source the file or restart your shell to activate the auto-completion.
$ sudo cp path/to/autocomplete/bash_autocomplete /etc/bash_completion.d/<myprogram>
$ source /etc/bash_completion.d/<myprogram>
Alternatively, you can just document that users should source the generic
autocomplete/bash_autocomplete and set $PROG within their bash configuration
file, adding these lines:
$ PROG=<myprogram>
$ source path/to/cli/autocomplete/bash_autocomplete
Keep in mind that if they are enabling auto-completion for more than one
program, they will need to set PROG and source
autocomplete/bash_autocomplete for each program, like so:
$ PROG=<program1>
$ source path/to/cli/autocomplete/bash_autocomplete

$ PROG=<program2>
$ source path/to/cli/autocomplete/bash_autocomplete
Customization
The default shell completion flag (--generate-bash-completion) is defined as
cli.EnableBashCompletion, and may be redefined if desired, e.g.:
package main

import (
    "log"
    "os"

    "github.com/urfave/cli/v2"
)

func main() {
    app := &cli.App{
        EnableBashCompletion: true,
        Commands: []*cli.Command{
            {
                Name: "wat",
            },
        },
    }

    if err := app.Run(os.Args); err != nil {
        log.Fatal(err)
    }
}
ZSH Support
Auto-completion for ZSH is also supported using the
autocomplete/zsh_autocomplete file included in this repo. One environment
variable is used, PROG. Set PROG to the program name as before, and then
source path/to/autocomplete/zsh_autocomplete. Adding the following lines to
your ZSH configuration file (usually .zshrc) will allow the auto-completion to
persist across new shells:
$ PROG=<myprogram>
$ source path/to/autocomplete/zsh_autocomplete
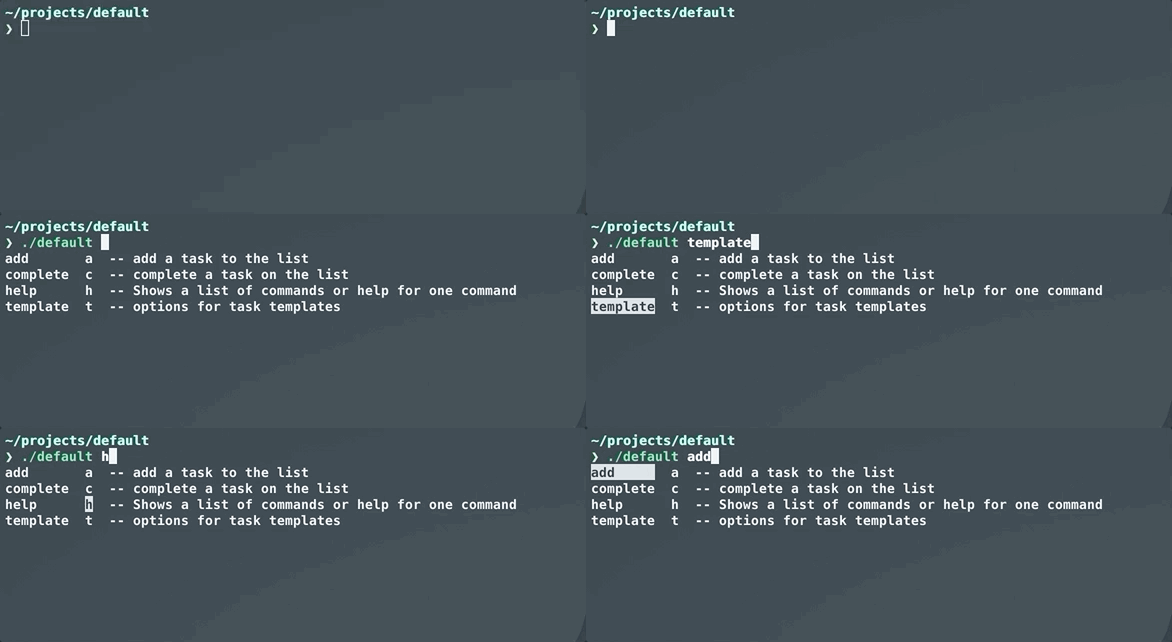
ZSH default auto-complete example

ZSH custom auto-complete example

PowerShell Support
Auto-completion for PowerShell is also supported using the
autocomplete/powershell_autocomplete.ps1 file included in this repo.
Rename the script to <my program>.ps1 and move it anywhere in your file
system. The location of script does not matter, only the file name of the
script has to match the your program's binary name.
To activate it, enter:
& path/to/autocomplete/<my program>.ps1
To persist across new shells, open the PowerShell profile (with code $profile
or notepad $profile) and add the line:
& path/to/autocomplete/<my program>.ps1